Zesty Peach Almond Ricotta Tart
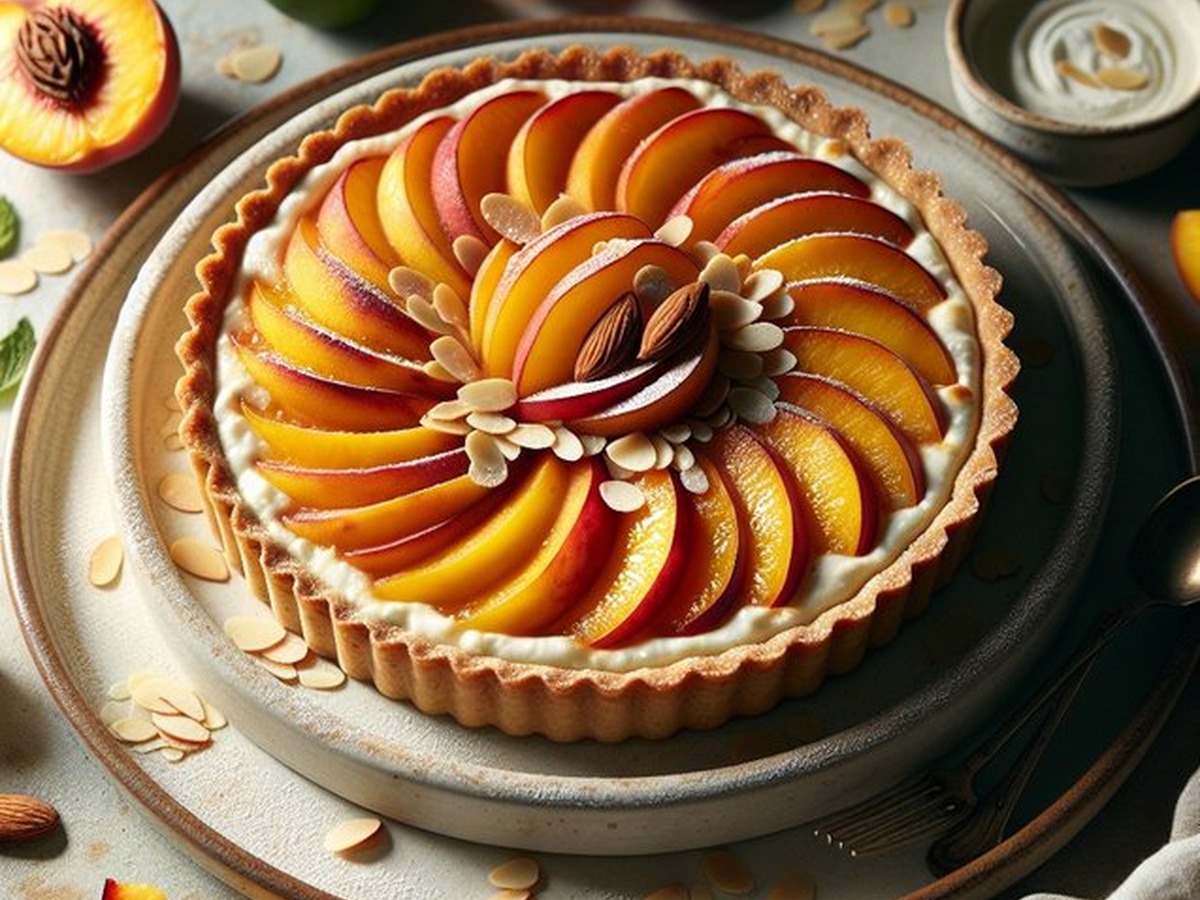
Creamy Peach Ricotta Tart with Toasted Almonds
Creamy ricotta, ripe peaches, toasted almonds, and lemon-cinnamon warmth come together in an easy Italian-inspired tart with a crisp, golden shell.
About This Recipe
Zesty Peach Almond Ricotta Tart has the easy elegance of a bakery dessert without asking you to make pastry from scratch. A crisp shell holds a cool, creamy ricotta filling, while ripe peaches bring pockets of softness and gentle sweetness. Toasted almonds, lemon, and cinnamon give each slice enough contrast to keep it lively rather than heavy.
Ricotta-filled tarts sit comfortably within the wider Italian tradition of crostate and home-baked pastries, where a simple shell becomes a frame for seasonal fruit. The exact combinations vary from kitchen to kitchen, so this tart is best read as an Italian-inspired expression of that tradition rather than a claim to one town or region. Peaches and almonds are a natural pairing: one is juicy and floral, the other warm, buttery, and crisp when toasted.
Using a prepared tart shell keeps the process friendly for a weeknight or a relaxed weekend lunch. The filling comes together in one bowl, and almond flour gives the ricotta enough body to slice cleanly once cooled. Keep the extracts measured; vanilla should round out the fruit, while almond extract is powerful enough to take over if it is poured with too much enthusiasm.
Choose peaches that are ripe enough to smell fragrant but still firm enough to slice. Very soft fruit releases extra juice, so pat the slices dry and fold them into the filling gently. The lemon-cinnamon topping brightens the dairy and keeps the brown sugar from tasting flat, while the almond layer browns on top and adds the crisp edge that a creamy tart needs.
The tart is ready when the center has lost its liquid wobble but still feels tender, not dry. Begin checking near the shorter end of the baking window because prepared shells can color quickly around the rim. Letting the tart cool fully is part of the recipe: it gives the ricotta time to set and keeps the first slice from sliding apart on the plate.
Serve it at room temperature or slightly chilled with mint, whipped cream, or a spoonful of plain yogurt. Refrigerate leftovers within two hours in a covered container and enjoy them within three days; the crust will soften, but the toasted almonds will still add a little texture. A crisp dessert wine, late-harvest Riesling, or lemony herbal tea makes a lovely partner for the peach and ricotta.
Ingredients
- 1 1/2 cups whole-milk ricotta cheese (360g)
- 1/2 cup powdered sugar (60g)
- 1/4 cup almond flour (25g)
- 1 teaspoon vanilla extract (5mL)
- 1/4 teaspoon almond extract (1mL)
- 1/2 cup ripe peaches, thinly sliced (75g)
- 1/4 cup sliced almonds (30g)
- 1 pre-made 9-inch tart shell (23cm), chilled
- 1 tablespoon fresh lemon juice (15mL)
- 1 tablespoon light brown sugar (12g)
- 1/4 teaspoon ground cinnamon (1g)
Step-by-Step Instructions
- Heat the oven Preheat the oven to 350°F (175°C). Place the tart shell on a baking sheet so it is easy to move in and out of the oven.
- Mix the ricotta filling Whisk the ricotta and powdered sugar in a mixing bowl until smooth. Add the almond flour, vanilla extract, and almond extract, then whisk just until combined.
- Fold in the peaches Fold the sliced peaches gently into the ricotta mixture, keeping the fruit pieces intact rather than crushing them into the filling.
- Fill the shell Spoon the filling into the chilled tart shell and spread it evenly from the center toward the edge. A level surface helps the tart bake at the same rate.
- Make the lemon-cinnamon topping Stir the lemon juice, brown sugar, and cinnamon together in a small bowl until the sugar is mostly dissolved.
- Finish with almonds Drizzle the lemon-cinnamon mixture over the filling, then scatter the sliced almonds evenly across the top.
- Bake the tart Bake for 40 to 45 minutes, until the center is set with only a slight wobble and the almonds and shell are lightly golden. If the crust browns early, loosely cover the edge with foil.
- Cool completely Transfer the tart to a cooling rack and let it cool to room temperature before slicing. This gives the ricotta time to firm and the peach juices time to settle.
- Slice cleanly Use a sharp knife wiped clean between cuts. If the tart has been chilled, let it stand for 10 to 15 minutes so the filling is creamy rather than hard.
- Garnish Finish with extra toasted almonds, fresh mint, or a little lemon zest just before serving.
- Serve Serve plain, with lightly whipped cream, or alongside unsweetened yogurt so the peaches remain the focus.
Nutrition Per Serving
| Nutrient | Amount | % Daily Value* |
|---|---|---|
| Calories | 320 kcal | 16% |
| Protein | 9 g | 18% |
| Total Fat | 17 g | 22% |
| Saturated Fat | 6 g | 30% |
| Carbohydrates | 36 g | 13% |
| Fiber | 2 g | 7% |
| Sugars | 21 g | 23% |
| Sodium | 200 mg | 9% |
Nutrition is an estimate based on the listed ingredients and four servings.
Variations & Serving Suggestions
- Use nectarines or plums in place of peaches when they are ripe and fragrant.
- Swap sliced almonds for chopped pistachios or hazelnuts for a different crunch.
- Serve with plain yogurt, softly whipped cream, or a small scoop of vanilla gelato.
Storage & Serving
Cool the tart completely, cover it, and refrigerate it within two hours at 40°F (4°C) or below. Enjoy it within three days; the crust will soften gradually while the ricotta filling remains creamy.
Let chilled slices stand for 10 to 15 minutes before serving. Add fresh mint, lemon zest, or extra toasted almonds after chilling so the garnish stays bright and crisp.
Practical Baking Notes
Pat very soft peaches dry before folding them into the ricotta so the filling stays creamy rather than watery.
A prepared shell can brown before the center sets. Shield the rim loosely with foil if it takes on color too quickly.
The tart slices best after the ricotta has cooled and firmed. Wipe the knife between cuts for neat wedges.
Troubleshooting
The filling is loose.
Likely cause: The tart was sliced while warm or the ricotta was especially wet.
Fix: Cool it completely before cutting and drain loose ricotta briefly next time.
The crust is browning too quickly.
Likely cause: The shell is thinner or darker than the one used for the timing estimate.
Fix: Loosely cover the edge with foil and keep baking until the center is set.
The tart tastes flat.
Likely cause: The peaches were mild or the topping lacked enough acid and spice.
Fix: Use fragrant fruit and finish with lemon zest, a small pinch of cinnamon, or a few mint leaves.
Frequently Asked Questions
Can I make this peach ricotta tart ahead of time?
Yes. Bake the tart up to one day ahead, cool it completely, cover it, and refrigerate it. Let it stand for 10 to 15 minutes before serving so the ricotta softens slightly, then add any fresh mint or extra almonds at the end.
What can I use instead of fresh peaches?
Use well-drained canned peaches, nectarines, or thinly sliced plums. If the fruit is very juicy, pat it dry first so it does not add excess liquid to the ricotta filling or soften the shell too quickly.
How do I prevent the tart crust from becoming soggy?
Start with a chilled shell, drain or pat dry juicy fruit, and cool the baked tart completely before covering it. Baking the tart on a sheet and avoiding extra liquid on the surface also helps the crust stay crisp around the edges.
Can I make this tart dairy-free?
Use a thick dairy-free ricotta-style cheese and choose a tart shell made without butter or other dairy. Check the texture before filling; if the substitute is loose, drain it briefly so the finished tart sets cleanly.
Cook Next & Build the Technique
Equipment
- 9-inch tart pan or prepared tart shell
- Mixing bowl
- Small bowl
- Measuring cups and spoons
- Whisk
- Rubber spatula
- Sharp knife and cutting board
- Baking sheet
- Cooling rack
- Serving platter